Showing posts with label Brazil. Show all posts

Tuesday, March 29, 2011

Vegan Paçoca

Paçoca is SO good. It is a Brazilian candy made of raw peanuts, sugar, condensed milk, and salt. What's cool about it is that if you replace the condensed milk (I used agave which has a similar sticky consistency and can hold the treat together), it is a naturally raw vegan dessert! Woot, woot!

It's so intensely peanut-buttery & salty-sweet. The consistency is really crumbly, which makes it fun to eat and make. Usually paçoca is served as little squares or as a crumble over other desserts. In fact, it would make a great pie "crust" to a raw vegan peanut butter-chocolate cheesecake.

Yay!

Oh, it's also widely eaten around Easter time which makes it perfect for this time of year. If you travel down to Brazil you might also find a new variety of Hershey's that you haven't seen before:


Cool, huh?


Of course, Hershey's candies aren't vegan. But hey, one can dream. If you dipped the completed product of this recipe in some melted chocolate (1 4oz bar unsweetened dark chocolate melted w/ 4 tbsp vegan margarine over low heat) you could make your own vegan Hershey's paçoca!


Vegan Paçoca

(pronounced like pa-SSO-ca)

1 1/2 cup roasted/salted peanuts
3/4 cup tapioca or manoic flour
1 cup vegan brown sugar
1/4 cup agave nectar (don't have it? use maple syrup)

1. Process all dry ingredients.

Manoic/tapioca flours come from the cassava plant which is known as the "bread of the tropics." Many South American and African desserts/dishes are made with the starchy tubers of the cassava plant. Another cool fact about it is that, when not cooked or processed properly cassava is poisonous. Both varities, sweet and bitter, naturally contain cyanogenic glycosides. That is... a cyanide group contained within the glycosides (sugars bonded with non-carb molecules) of the plant. 

No need to fear, though! The flours that you can buy (Bob's Red Mill is a good brand) are completely safe to consume, and so is properly prepared cassava! Usually boiling, soaking, or baking the plant does the trick. In fact, I've had cassava several times before in various West African dishes and it is delicious.


The mixture will be crumbly before you add the agave.
I don't know why my hand looks like Quasimodo's hand here.

2. Add agave and process again. Try to squish the mixture with your hands. If it stays together, you're A-OK. If it doesn't, add a little more agave & process again.

3. Simply take a palm full of the mixture in your hands and press into small squares. Some people like to pat the entire mix down into the bottom of a pan and cut square shapes out, but I think doing it with your hands is easier.

Eat, eat, eat! Happy spring!


Thursday, March 24, 2011

Vegan Brigadeiros

Well, after 4 1/2 fretful hours, full of not bi, but trilingual curses, I FINALLY managed to invent the recipe for vegan brigadeiros!! It was so difficult because traditional brigadeiros, a Brazilian bon-bon like candy staple, are made with only a few ingredients, chocolate, butter, and condensed milk.

It took me AGES to condense my own vegan soymilk, but I did it! Booyeah! I must say the end product is just as tasty & complex (if not more so..) than the good-old fashioned favorites!

So, for all you brave souls who wish to create condensed vegan milk on your own... make sure you have several hours at hand. Otherwise, I found a cool-looking substitute that I have yet to try: Olvebra brand condensed soyamilk

However, there's something about accomplishing a time-consuming task like this recipe on your own. It makes you feel like you've created life! It's like they're my little delicious children! Granted, that is bordering on weird. But you couldn't pull the smile off my face for an hour, amigos!

I think next time I will try making the condensed soymilk in a slow-cooker and see how it turns out. Anyways, I used to looooove these treats before I became a vegan and I am so happy & proud to share the recipe with all of you!


Vegan Brigadeiros

3 1/2 cups unsweetened soy milk
6 tablespoons of vegan margarine
1/2 cup of vegan sugar
3 tablespoons of unsweetened cocoa
pinch salt
walnuts (traditionally they use chocolate sprinkles!)


1. Melt the margarine in a pan, adding the sugar. Stir consistently until the sugar is liquified.


2. Bring the soil milk to a boil and combine the margarine/sugar mixture with the soy milk. Add the pinch of salt.


3. Simmer mixture for several hours making sure to stir frequently so the bottom of the mixture does not burn. Use a wooden spoon. You want the boil to be a very, very gentle one. Keep the temperature low! This step may take up to 3-3 1/2 hours. I promise the results are well-worth the labor!

*Note: you will continually need to lower the temperature bit by bit as the soy milk condenses into a lesser and lesser volume.

**You will also see a "milk film" start to develop on top of the soy milk after a little while. This is a good sign, and also a sign that you should stay patient and keep simmering! (Patience seriously sucks, I know).


4. Eventually, depending on your cookware and the heat you are using, the mixture will condense to a definite thick pudding-like consistency (one that won't completely lose it's shape when you pick it up in your hands). Add the cocoa powder and whisk until the mixture is uniform. After you have achieve this pudding-like consistency, simmer very gently for approximately 15 more minutes and then let the mixture completely cool.


5. Take the completely cool mixture and heat it to high-heat on your stove very quickly. Stir constantly. Cook for 10 minutes. Scrape the bottom of the pan with your wooden spoon to keep it from burning. The mixture will look like it's starting to come apart, the oil bleeding out onto the pan. This is a good sign. Just keep mixing!


6. After you have done this, you should have an easy-to-mold blob of delicious condensed vegan milk and chocolate brigadeiro! Take it apart tiny bite-sized piece by tiny bite-sized piece, and pat them on a paper towel to remove excess margarine grease. Roll them through sprinkles to get the traditional effect (all I had were walnuts!). I find the walnuts add an appealing crunch to the smooth bon-bon texture.


7. They should be eaten right away or stored in the fridge to chill and enjoyed any time!


Sucesso!!

Once I get my hands on some of that cool Olvebra brand condensed soy milk, I will try out this recipe the easy-peasier way.

Tuesday, March 22, 2011

Vegan Pão de Queijo

An absolutely delicious Brazilian street food, pão de queijo is a Brazilian cheese puff/bread. They are, of course, made with cheese (usually parmesean). I tried to replicate the flavor as best I could! Traditionally, they are cooked with tapioca flour which makes for a very light texture. I didn't have any of this on hand, so I used a heavier garbanzo bean flour... it made for moist, cheesy, dense cookies. I think they'd be perfect with raspberry preseves.

Ps. pão de queijo is pronounced like (poh-jeh-kay-zjho). The more ya know!

Since the oven in my apartment gets to about 8,000 degrees, I YET AGAIN nearly burnt my fingers off despite buying new and adorable parrot-themed potholders. Damn you, oven, damn you.


Pão de Queijo
(literally "bread of cheese" or Brazilian Cheese Bread)
1/2 cup olive oil
1/3 cup water
1/3 cup unsweetened almond milk
1 tsp salt
2 cups garbanzo bean flour (or tapioca flour)
2/3 cup nutritional yeast
2/3 cup vegan cheese (Daiya, or any other brand!)
dash cracked black pepper
1 tsp garlic powder
egg replacer for 2 eggs


**Preheat oven to 375 degrees.


1. Boil the olive oil, salt, water, and almond milk over the stove. Remove it immediately and add it to the flour mixture.


2. Stir in the garlic power, egg replacer, and cracker black pepper.


3. Add the nutrional yeast.


4. Fold in the vegan cheese.


5. Make small 1-inch circles and place onto an ungreased baking sheet. Cook for 15 minutes, or until the tops are lightly browned. My oven was being whacky so I had to cook each side separately for about 8 minutes to get it browned without burning it. Sigh, my oven.


(My conscience is saying, AT LEAST YOU HAVE AN OVEN. So right.)


Sunday, March 13, 2011

Brazilian Orange & Blackberry Cheesecake

Yay, the cheesecake returns! I just finished a massive piece of this and eff, if I do say so myself, it's effing good. The awesomeness makes my brain hurt and also makes me want to samba. But I promise, there's no "goodnight Cinderella" inside of this cake. If you don't know what that is, consider yourself lucky. (Also be careful in Rio).


Brazilian Orange & Blackberry Cheesecake

Crust:
2 cups of Brazil nuts
juice of 1/2 an orange
rind of 2 oranges
2 tbsp honey
1 tsp vanilla

Filling:
3 1/2 cups cashews (soaked for 1-4 hours)
juice of 1 1/2 orange
1/2 cup lemon juice
1 cup coconut oil
2 tsp vanilla
1/2 cup honey

Topping:
1 1/2 pint blackberries, mashed with fork

1) Simple food process all of the ingredients for the crust and then press them into a 9-inch pie plate.


pretty grated orange rind!


2) Next food process all filling ingredients. Make sure to melt down the coconut oil in a small bag (it's easy to do this in a bowl of hot water) to liquify it. Pour the filling mixture over the crust. Let this sit in the freezer for 4 hours, yo.


It was so sunny and wonderful today!


3. Take cake out of the freezer. Mash up the 1 1/2 pint of blackberries with a fork in a small bowl and spread over the top of the cheesecake. Serve!


You can store this in the fridge for up to 5 days. Or until the blackberries start to get moldy. Yeeeah.


Vegan Vatapá

Your Vegan Zombie is going Brazilian. I've been soooo intensely interested in South American cuisine lately, especially since almost every dish consists some type of meat or lard. My goal is to rework these fabulous and colorful plates so we vegans can enjoy them too! Blasphemy, you say? Hopefully Our Lady of Guadalupe can forgive us, mi amor.

BRAZIL is the best place on the planet.


They have incredible food, art, music, history, people, the Christ the Redeemer Statue (just beautiful, though!), cities, an up and coming economy, sun, the World Cup in 2014 (I am totally going to GO MAN)  ...and uh, did I mention food?

Brazilian cuisine has a wide array of influences including African, Portuguese, and Italian. The food utilizes the country's rich and abundant tropical fruits, the bounty of the gorgeous coastline, and native nuts.

This dish, called vatapá, is typically made as a "seafood stew" and has West African influences. Of course, we couldn't include shrimp like the locals do (or sometimes white fish), so I veganized this puppy with a grain that has a similar rubbery quality to it--- barley. If left a little al dente, you can get the same feeling. For added "seafood" flavor I could have added a little nori, but no one in my family would have eaten it that way... and I'm a slave to feedback and compliments, what can I say?

The brilliant yellow coloring comes from the Brazilian dendê oil, a palm oil frequently used in Brazilian cooking. The texture of this dish is extremely unique... too thick to be a stew. I don't know. It owns.

Vegan Vatapá

2 chopped onions
3 cloves of garlic, chopped
4 malagueta or jalapeño chile peppers, chopped (use 1 or a gentler pepper if you aren't into spicy!)
2 tbsp olive oil
1 1/2 cup vegetable stock
1/2 cup organic peanut butter
1 cup whole wheat bread crumbs (or just put two slices of whole wheat bread in a food processor)
salt and pepper to taste
1 1/2 cup barley, cooked and drained
2 cups coconut milk
1/4 cup Dendê oil


1) Chop up the onions, peppers, and garlic. Toss it into the food processor.


2) Add this mixture along with 1/2 cup of your cooked barley onto the stovetop. Cook in 2 tbsps of olive oil for about 7 minutes to meld flavors.


3) Next, add the vegetable stock and peanut butter. Whisk until everything is smooth. Add breadcrumbs, salt, and pepper. Let the mixture boil, then lower the temp to a simmer for another 8 minutes.

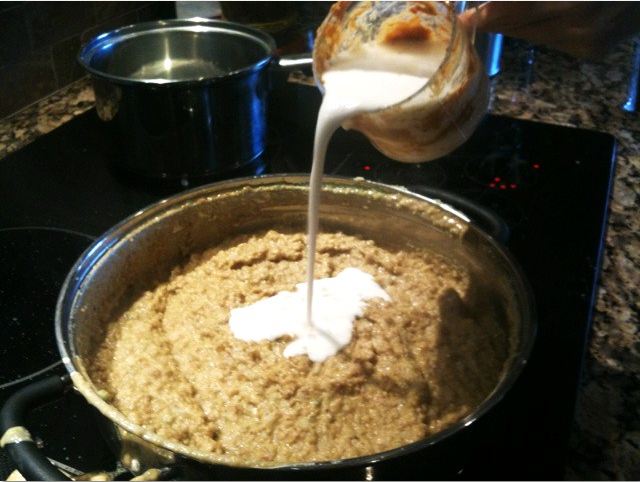
4) Add the coconut milk and cook for another 5 minutes on a low temperature.


5) Lastly, stir in the dende oil, remaining barley, and serve! I topped the dish with tomatoes and paprika.